I have always wanted to buy a camcorder, and I finally did it :). Today I made a makeup tutorial for people that wear blue contact lenses. As ya'll know, I love blue contact lenses, so it's kind of befitting that that video is my first.
It took only 20 minutes to film myself putting on the makeup, and the best part of 6hrs to edit the video, add music, narrate, only to find that the music I had chosen and saved on the video was simply too loud to be narrated over *sigh*. It took hours to save and hours to upload to YouTube, but I finally did it. I can't upload it from YouTube, as I cannot find it on YouTube haha! But here is the link if anone wants to check it out:
http://www.youtube.com/watch?v=0zgju9EE7y4
The camcorder has no auto focus and no optical zoom so it's a bit limited as to what it can do, hence my blurry face when I sit more than a foot away from the camcorder. I hope you enjoy it.
Have fun guys x
Thursday 1 September 2011
Tuesday 23 August 2011
Coloured Contact Lenses Part Two
It's been a while since my last blog and I've been feeling a bit down recently, so I thought I'd cheer myself up by blogging about some more contact lenses. The lovely Kate from www.eyesbright.com (please click link to go straight to the website) very graciously sent me a pair of lenses of my own choosing to review on my blog. I chose Big Eyes 15mm in Beautiful Blue.
When they first turned up I was blown away by not only the colour, but by the size - they're larger than the normal contact lenses I normally purchase so I was a bit worried that they would be hard to put in or be uncomfortable once they were in. Well, I needn't have worried, they were just as easy to pop into my eyes and they are actually more comfortable than normal lenses to wear. Here is a closeup of my eyes with them in:
 As you can see here, these are large lenses (again I cannot stress how comfy they are to wear). The pupil hole is also quite large so some of my iris and my pupils can be seen, but I don't really care. Isn't the colour quite striking? I have been wearing coloured contact lenses for just over a year now and I actually got comments from people on my eyes wearing these. Most people loved them, and one guy said my eyes looked like Doll's eyes and it freaked him out, but that's the look I was going for anyway haha!
I decided to wear a small amount of foundation to even out my skin and set it with powder and applied a generous amount of blusher on my cheeks to give myself a Doll-like look. I am wearing Urban Decay's eyeshadow in Midnight Cowboy, because it is a nude colour with sparkles which I love, and two coats of mascara to make my lashes thicker. I tried to flick my eyelashes outwards to give an innocent, wide-eyed look. I decided not to colour in my eyebrows as I normally do, but I did use a Lancome lipstick to set the whole look off. Here are the resulting photos:


 Ta-daaahhhh! Big Eyes 15mm in Beautiful Blue!
The makeup I used for this blog is as follows:
Contact Lenses were Big Eyes 15mm in Beautiful Blue from www.eyesbright.com
Foundation used was Clinique Anti-Blemish Solutions in Fresh Alabaster
Powder to set was Revlon PhotoReady compact powder in shade 010 Fair/Light
Blusher was Lily Lolo's Mineral Blusher in Cherry Blossom
Macara was Revlon Double Twist in shade 01 Blackest Black
Lipstick used was Lancome's L'absolu Nu in shade 202 Ojab
I just want to give a Special Thank You to Kate from Eyesbright for letting me review these lenses on my blog, you have been wonderful, kind and generous x
When they first turned up I was blown away by not only the colour, but by the size - they're larger than the normal contact lenses I normally purchase so I was a bit worried that they would be hard to put in or be uncomfortable once they were in. Well, I needn't have worried, they were just as easy to pop into my eyes and they are actually more comfortable than normal lenses to wear. Here is a closeup of my eyes with them in:

I decided to wear a small amount of foundation to even out my skin and set it with powder and applied a generous amount of blusher on my cheeks to give myself a Doll-like look. I am wearing Urban Decay's eyeshadow in Midnight Cowboy, because it is a nude colour with sparkles which I love, and two coats of mascara to make my lashes thicker. I tried to flick my eyelashes outwards to give an innocent, wide-eyed look. I decided not to colour in my eyebrows as I normally do, but I did use a Lancome lipstick to set the whole look off. Here are the resulting photos:


The makeup I used for this blog is as follows:
Contact Lenses were Big Eyes 15mm in Beautiful Blue from www.eyesbright.com
Foundation used was Clinique Anti-Blemish Solutions in Fresh Alabaster
Powder to set was Revlon PhotoReady compact powder in shade 010 Fair/Light
Blusher was Lily Lolo's Mineral Blusher in Cherry Blossom
Macara was Revlon Double Twist in shade 01 Blackest Black
Lipstick used was Lancome's L'absolu Nu in shade 202 Ojab
I just want to give a Special Thank You to Kate from Eyesbright for letting me review these lenses on my blog, you have been wonderful, kind and generous x
Thursday 28 July 2011
Makeup Remover
I blog about putting makeup on but as of yet have to say what I use to take it all off again. Up until the last year I have been fairly fond of face wipes as my go-to remover, but let's face it, not all of them are up to the task of taking off your makeup, even if they claim on the packet that they can. I have used many different brands of makeup wipes, ranging from £6 per packet to just 28p, and to be completely honest they all do the same job. I also find that makeup wipes dry quickly once taken out of the packet, which means sometimes you have to scrub your skin a bit harder than you should.
After using different types of makeup remover wipes, creams, etc, I discovered Garnier Skin Naturals Simply Essentials 2 in 1 Makeup Remover a few months ago and it looks like this:
 It's contains and blue and clear liquid (as you can well see). The blue liquid is an oil and the clear stuff is (I think) basically water. Here's a closeup of the bottom of the bottle:
 I like the fact that it has no perfume and no alcohol, and that it is suitable for sensitive skin. I personally don't think I have sensitive skin, but I like to treat my skin like it is. This makeup remover reminds me of a cheap version of Lancome's Bi Facil makeup remover, which also has and oil/water combination, which is amazing at removing makeup but I can't afford the £18-22 price tag it carries:
 I have used the above makeup remover, and I can definitely recommend it if you have the money - Lancome's products are top-notch, and I have been in love with their stuff since I got my grubby mitts on my first Hypnose mascara but I'm on a budget so can only buy their makeup etc as a rare treat. Anyway, back to my product:
 You can click on this picture so you should be able to read what most of the bottle says up close. All I can say is that it dissolves makeup really quickly and smooths it off your face without harsh rubbing or pulling. It is safe to use over your eyes too, so there's no real need to buy/use a separate eye makeup remover. You just shake the bottle 'til the whole contents of the bottle has turned light blue, quickly squeeze some onto a cotton pad and them smooth over your face and eyes - done! It leaves a very slight oily feel to your face, but a little toner will get rid of that. It only costs about £3, so well worth the money. Try it, I reckon you won't be disappointed. What kind of makeup remover do you use? Would you recommend it too? Let me know! Have fun x
After using different types of makeup remover wipes, creams, etc, I discovered Garnier Skin Naturals Simply Essentials 2 in 1 Makeup Remover a few months ago and it looks like this:


Monday 25 July 2011
Back to Black
It came as a very sad surprise to me to find out that the incredible, amazingly talented British singer, Amy Winehouse was found dead in her apartment on Saturday 23rd July 2011 at the age of just 27. I am absolutely devastated, and I would just like to say, Amy, you rocked our world. You had a sublime voice, you shared your short life with us in the only way you knew how, you really were an amazing person.
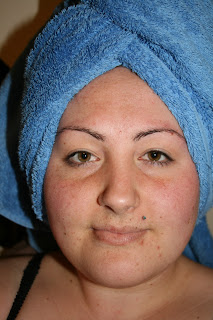
 Amy was very well known for her beehive hairdo, tattoos and very striking black eyeliner. She had wonderful, clear skin, full lips - basically she was naturally very beautiful. I wanted to do a very quick makeup look to celebrate her life, although I had to use foundation and powder to achieve her pale, clear skin. I have absolutely no idea how to make a beehive hairdo so I just kept my hair back for this picture:
 Ok, so I know I look nothing like her, but I hope you can see that she inspires me greatly. Big Love to y'all out there xxxxxx
Amy Jade Winehouse, Born 14th September 1983 - Died 23rd July 2011
Rest In Peace


Amy Jade Winehouse, Born 14th September 1983 - Died 23rd July 2011
Rest In Peace
Thursday 21 July 2011
Coloured Contact Lenses
I may never have gotten round to telling y'all, but I have been a lover of coloured contact lenses for about a year. I have murky green eyes with brown around the pupils, so most people tend to think I have brown eyes. In fact you can only tell I have green eyes out in direct sunlight *sigh*
I have always wanted to know what I would look like with blue eyes, and I sort of found out when I tried Freshlook Colorblends. The colour was a bit too natural for me, and wasn't striking enough, so my search continued... Well, I need not search any more... I found...
www.eyesbright.com
This website is the bomb for coloured contact lenses! I mean they have so many colours, designs, crazy, funny, bright, dark lenses, there must be a pair of lenses for all tastes no matter what person you are, no matter what look you want - they probably have it! They also sell face jewels, false eyelashes, glitter dust, contact lens solution, the list goes on...
Anyway, I do blather on... I bought two pairs; Vivid Blue and Blue Batik. The first pair lasts for 90 days and only cost £13.99, a very reasonable price indeed :). The second pair lasts for a year (yay!) and they cost £17.99. That's incredible value for a pair that last for an entire year! I paid for next day delivery (like I'm the type to wait!) and couldn't wait to try them!
This pair below is Vivid Blue (my eyes are green/brown mix):
 Ooo, aren't I the poser!
 The above picture is a close up (sort of). I really like how they make my eyes look (can you tell by my smile?). Ok, so the next ones are Blue Batik, they are solid colour (not solid lens) sky blue contacts with an intricate white pattern in the middle, making them super bright. Here are the results...
 I love these, they made me feel all vampire-y like Selene from Underworld (although much plumper and not as pretty)
 Oh, to look like Kate Beckinsale... *sigh*. Anyway, I was feeling so inspired I thought I'd pop my petite Scarecrow fangs in and took a quick picture:
 Ok, if you squint very hard you'll see a hint of fangs. I was going for a subtle look, seeing as how my eyes were already doing all the work for me.
I have to say that I am very impressed with the range of contact lenses that Eyesbright have, I absolutely adore their blue range (I want them all!!!) and I will definitely be buying more from them in the future. I think next on my list will be Big Eyes in Beautiful Blue and perhaps a pair of normal Blue ones, just to see how much they'd change my eye colour. That's it for now, have fun guys x
I have always wanted to know what I would look like with blue eyes, and I sort of found out when I tried Freshlook Colorblends. The colour was a bit too natural for me, and wasn't striking enough, so my search continued... Well, I need not search any more... I found...
www.eyesbright.com
This website is the bomb for coloured contact lenses! I mean they have so many colours, designs, crazy, funny, bright, dark lenses, there must be a pair of lenses for all tastes no matter what person you are, no matter what look you want - they probably have it! They also sell face jewels, false eyelashes, glitter dust, contact lens solution, the list goes on...
Anyway, I do blather on... I bought two pairs; Vivid Blue and Blue Batik. The first pair lasts for 90 days and only cost £13.99, a very reasonable price indeed :). The second pair lasts for a year (yay!) and they cost £17.99. That's incredible value for a pair that last for an entire year! I paid for next day delivery (like I'm the type to wait!) and couldn't wait to try them!
This pair below is Vivid Blue (my eyes are green/brown mix):


I have to say that I am very impressed with the range of contact lenses that Eyesbright have, I absolutely adore their blue range (I want them all!!!) and I will definitely be buying more from them in the future. I think next on my list will be Big Eyes in Beautiful Blue and perhaps a pair of normal Blue ones, just to see how much they'd change my eye colour. That's it for now, have fun guys x
Thursday 26 May 2011
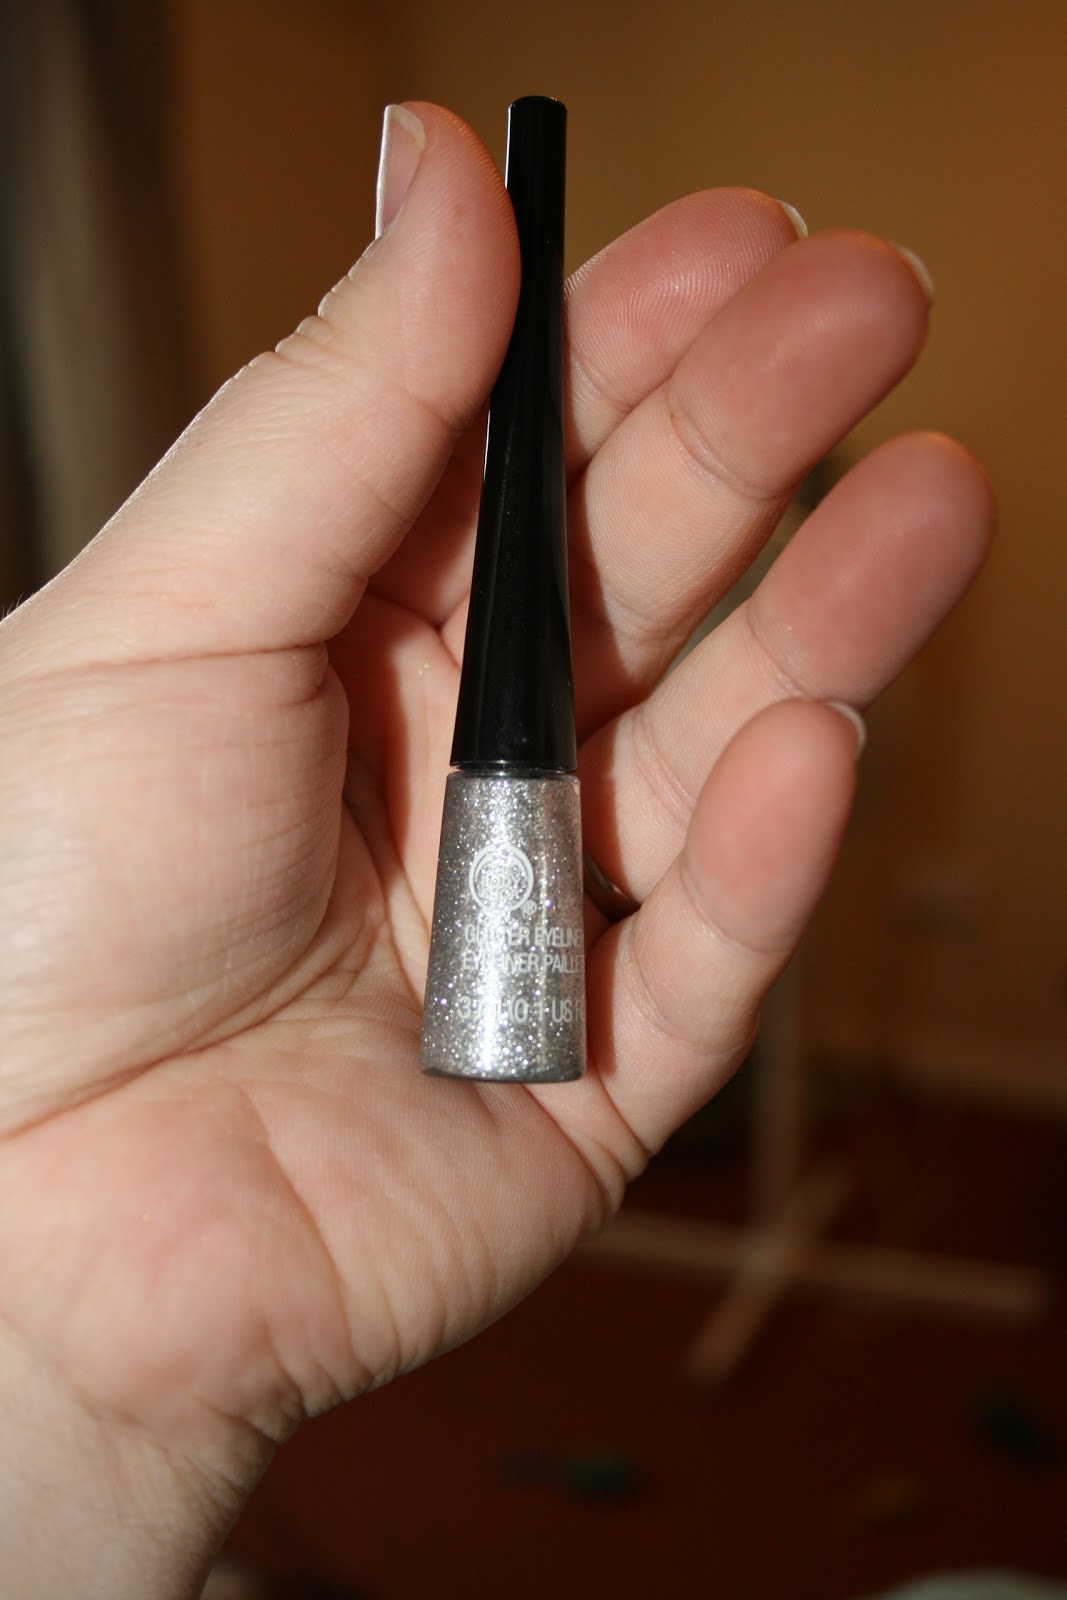
The Body Shop Glitter Eyeliner
If you're a glitter fan like me then you'll love this cute little eyeliner from The Body Shop. Seriously. I. Love. Glitter. If I could get away with wearing glitter all over my face, body and hair, believe me, I would. But unfortunately I am all grown up and must keep my glitter down to a minimum. But, dear readers, do not despair! We can still wear glitter! Even if I am closer to 30 now than 20...
I bought this eyeliner, brand new, from eBay, for the teeny tiny price of just £1.99! If you're not as cheap as I have been recently then I would suggest Urban Decay's Heavy Metal glitter eyeliner, it's very long wearing, the glitter particles are bigger and it's very sparkly. Anyway, back to my eyeliner...
 This modest little tube contains a lovely amount of glitter, so don't worry when you see how teeny the tube is. The liquid holds a fair amount of glitter, and one sweep across your upper lash line should be enough to give you a decent sparkle from inner to outer corner! I like to use the glitter around my tear ducts to brighten up my eyes. TIP: If you use glitter eyeliner make sure you curl your lashes gently and use two coats of mascara - maximum - more than that and you may start looking a bit over-done.
 Ok, you are probably straining to see the difference but if you squint really hard you'll see that the inner corners of my eyes look a touch brighter. Squint no more, dear readers, here is a close up:
 Ummm, sorry for the rubbish close-up but I was in a bit of a hurry! But you see what I mean? Not too much glitter, but enough to feel bright and perky! This is great for an every day look, simple, easy and makes me feel so much younger!! I am using Maybelline "The Falsies Volum' Express" in 'Black Drama' mascara. It tends to flake if you use too much so use it sparingly. Ok, so I slap on the rest of my makeup and head off to work. 14hrs later, my eyeliner and mascara look like this:
 There's a few tell tale flakes but not so bad that they can't be smoothed away. As for the glitter eyeliner, not bad for 14hrs wear, I'd say. It is also easy to remove with normal face wipes or makeup remover, and the chances of getting glitter in your eyes whilst removing your eye makeup is almost non-existant, whereas there's a much higher probability when you use Urban Decay's eyeliner. Trawl through eBay and find yourself a bargain like I did! Have fun x
I bought this eyeliner, brand new, from eBay, for the teeny tiny price of just £1.99! If you're not as cheap as I have been recently then I would suggest Urban Decay's Heavy Metal glitter eyeliner, it's very long wearing, the glitter particles are bigger and it's very sparkly. Anyway, back to my eyeliner...


Nivea Visage Daily Essentials Tinted Moisturising Day Cream
Hello! Now I must admit here that I am not much for tinted moisturisers because I like foundation coverage better, but I was shopping in Tesco and I was in need of a new moisturiser and this one is currently on offer at just £1.50! In these times of recession, who am I to turn my nose up? This is what the (opened) box looks like:
 This moisturiser is for all skin types (hooray!) in the shade "Natural".
On the top of the back of the box it reads "A touch of natural colour is essential to brighten your skin's natural complexion and give it immediate radiance"
Below that is states:
NIVEA VISAGE DAILY ESSENTIALS TINTED MOISTURISING DAY CREAM enriched with Light Reflecting Pigments and Vitamin E, provides the skin with essential intensive moisture and enhances your natural skin tone all day long:
So in it went into my trolley. A moisturiser for all skin types and the promise of possibly having more radiant skin at the same time, hooray! The tube looks like this:

Nothing terribly special, a squeezy 50ml tube with a screw on cap, simple and sweet.

This is what the colour looks like on the back of my hand. Quite dark looking, really. The moisturiser is of creamy consistency, smells a bit like sun cream/sun block and blends into the skin quite smoothly and doesn't actually look too dark once smoothed in. Thank goodness, for my skin (under the red cheeks) is actually rather pale!
Here is a picture of me with half of my face with this moisturiser on, the other with none:
 ARGGHHH! Me with bed hair and loads of spots! *sigh* Oh well, I had just gotten out of bed I suppose... Anyways, the left side of the picture is with the moisturising cream, and the right is my bare face. There's not a really noticeable difference but the left side looks just a little bit less red, if you know what I mean? I had to blend it well at my jaw line as it was a tad too yellow, but other than that it went on fine, so I quickly put it on the rest of my face (blending gently) and this is the end result (more bed head alert!) :
 I think that my face here looks a little bit more even, it certainly feels nice and moisturised, and after all that's sort of what we want from a moisturiser! I think if I was in a hurry to put on my makeup I could probably just smooth some of this on, set it with a little powder and a touch of mascara and I wouldn't feel half bad :)
I think, for £1.50 this is a bargain, and as it's for all skin types, why not give it a go? Hurry on down to Tesco, before the offer ends! Have fun x

On the top of the back of the box it reads "A touch of natural colour is essential to brighten your skin's natural complexion and give it immediate radiance"
Below that is states:
NIVEA VISAGE DAILY ESSENTIALS TINTED MOISTURISING DAY CREAM enriched with Light Reflecting Pigments and Vitamin E, provides the skin with essential intensive moisture and enhances your natural skin tone all day long:
- With a special blend of light-reflecting and colour pigments this light daily moisturiser brightens up your complexion.
- With UVA/UVB filters and Vitamin E, it helps to protect from environmental influences that result in premature skin ageing
So in it went into my trolley. A moisturiser for all skin types and the promise of possibly having more radiant skin at the same time, hooray! The tube looks like this:

Nothing terribly special, a squeezy 50ml tube with a screw on cap, simple and sweet.

This is what the colour looks like on the back of my hand. Quite dark looking, really. The moisturiser is of creamy consistency, smells a bit like sun cream/sun block and blends into the skin quite smoothly and doesn't actually look too dark once smoothed in. Thank goodness, for my skin (under the red cheeks) is actually rather pale!
Here is a picture of me with half of my face with this moisturiser on, the other with none:


I think, for £1.50 this is a bargain, and as it's for all skin types, why not give it a go? Hurry on down to Tesco, before the offer ends! Have fun x
Monday 23 May 2011
John Frieda Frizz-Ease 3-Day Straight
Ok, so after a hefty silence of no blogging whatsoever I thought it was about time I stopped procrastinating and just got on with some reviews! And today I will be reviewing the new 3-Day Straight for curly hair by John Frieda.

Basically, what this is is a liquid that you spray onto wet or damp (but not dry) hair, comb through and then blow dry, followed by some hair straighteners. It claims to help keep your hair straight for up to 3 days. Personally, I never fall for the "stays on for up to 12 hrs!" claims because that rarely ever happens so I am naturally not going to assume that my hair will stay straight for 3 whole days. I like to see such claims as those as more of guidelines than the absolute truth. It says to use between 7 and 15 sprays "Use more or less depending on amount of curl, hair length and thickness".
My hair is half way down my shoulder blades, is very thick (I have enough hair on my head for at least three girls), and it is curly to boot. Not massively curly, for my hair is too heavy and tends to pull what would be ringlets into loose curls, so I decided that I am the perfect candidate for this hair product.
Please forgive my total lack of makeup in this blog, I hate my face without the comforting layer of foundation and my eyes are tiny and tired without some mascara to perk them up - but - I am blogging about my hair, so here we go:

My hair is damp with about 12 sprays of the liquid in it, brushed through thoroughly with a paddle brush. Now to commence with the blow drying. Just so you know I don't blow dry my hair - ever - even though I do own a hair dryer I don't use it more than maybe once a year. I'm a big fan of letting my hair dry naturally :)

Eurgh! This is me after my pitiful attempt at blow drying my hair straight. I don't look happy because my hair is now half straight and big and fluffy, which I personally detest. Also I would like to say that at this stage my hair has taken on a slightly sticky quality, due to the Frizz-Ease liquid in it. Quickly! Time for the straighteners (which are four year old GHD's)!!

This is... well... sort of... the end result... Basically after I had finished straightening with my GHD's, my hair, with the help of John Frieda, was straight but completely weightless. Weightless, straight, thick hair means BIG hair and big hair is a BIG no-no for me. I have heard and read how it makes your hair poker straight and flat to your head. For me this is completely untrue, and I hated how my hair was straight AND orbiting around my head like it had its own gravitational field. So I grabbed up my trusty Paul Mitchell smoothing Super Skinny Serum:

This liquid should be clear and smell really deliciously fruity, but unfortunately I left it in the bathroom window in the summer sun, so now it is translucent-ish and smells a bit weird but still does the job. I used about three pumps of this and smoothed it all over my hair, and then last but not least rubbed two pea sized amounts of John Frieda's Brilliant Brunette Satin Shine to help weigh my hair down that tiny bit more:

Tuesday 12 April 2011
Too Faced Shadow Insurance
Hi there, today I am going to blog about Too Faced Shadow Insurance. It's a silicone based primer to go on your lids before you put eyeshadow or eyeliner on to prevent creasing and transferring:
 Above is what the tube looks like. I love the fact that this is a squeezy tube with a small, nib-like end, unlike Urban Decay's primer potion, which is in a genie shaped bottle/tube and has a wand, and does pretty much exactly the same job BUT with one big difference: you can get ALL the product out of a Shadow Insurance tube eventually - whereas with Urban Decay's tube you literally have to cut the bottle open to get out the last remaining primer - would you want to do that just so you get your money's worth? No, I didn't think so haha! Also for those really wanting to save their pennies, Too Faced is 50p cheaper than UDPP in Boots... So, anyway, I need my eyeshadow (when I wear it) to last at least 14hrs minimum due to work, I can't be dealing with unsightly creases and I certainly don't have time to reapply eyeshadow. Ok, so here is a picture of my closed eye at the beginning of my work day at 4pm:
 Ehem, please ignore my very visible pores lol - but see how the colour looks relatively vibrant (well, for browns I suppose!). So off I head to work, do my nightshift, then get home at 6am. I was very tired so please also forgive the fact that I took a picture of my other eye (also shut) but don't be dissuaded; they both looked the same at the end of the night/morning, and here is my other eye 14hrs later:
 I took this picture in a darkened room with a flash (as it was 6am after all) but as you can see, there are no creases and the colour still looks great. Too Faced Shadow Insurance definately does the trick for me. All you need is to squeeze a very small drop of the flesh coloured primer onto your finger, dot onto clean lids (I pat my eyelids very gently with a clean tissue to absorb oil before application) and then blend very gently - try not to drag or pull at your eyelids. It dries quickly and easily and leaves a wonderful base for eyeshadow :)
I just thought I should say here that I don't think it's very healthy to be putting silicone primers over your eyelids all the time - try to give yourself at least two or three days a week where you let your eyelids breathe, treat them with rich creams or even a tiny bit of vitamin E oil to keep them supple. Have fun :)


I just thought I should say here that I don't think it's very healthy to be putting silicone primers over your eyelids all the time - try to give yourself at least two or three days a week where you let your eyelids breathe, treat them with rich creams or even a tiny bit of vitamin E oil to keep them supple. Have fun :)
Thursday 7 April 2011
My Basic Look
Well, here I am on blog number three - apologies to all for not having blogged sooner; life has been keeping me busy!!
I have decided to show you my basic look for when I am out and about. I am wearing eyeshadow, mascara and a tiny slick of lipgloss too but for the moment I'm just going to talk about the makeup I wear on my face haha! Ok, so here are the four basic things I wear on my face (and they're ALL drugstore and relatively cheap - yay!):

Ok, from left to right is Superdrug Vitamin E Illuminating Moisture Cream with SPF 15, Revlon Colorstay Liquid Foundation for Combination/Oily skin in 110 Ivory SPF 6, Revlon PhotoReady Powder SPF 14 and last but not least MaxFactor Flawless Perfection Blush in 220 Classic Rose. Because you can't really see the MaxFactor properly, I'll add another picture of the back so you can see :)
 Ta-dah! Hehehe :) The moisturising cream is super cheap at under £3! It has light reflecting particles in it to "give your face a glow" but on my face it just makes it look super oily haha, but it makes for a wonderful makeup base. I use it everyday under my makeup, even with my acne-prone, combination skin. Also it has an SPF 15 which is VERY important to keep your skin protected from the sun, even in winter!
The Revlon liquid foundation costs about £12.50, maybe a little more than some people are willing to spend and boasts a semi-modest SPF 6 - again, important! It is quite a thick liquid with medium to full coverage which is a must for me. I use my fingers to blend it into my face and it doesn't take long to blend and dry. The Revlon Powder to set the foundation has an SPF 14 (more cheers from my protected skin!), costs about £13 and it comes with a little brush you can sweep the powder on with which is quite handy, although the brush loses its bristles fairly easily - no matter though - I have other brushes!
MaxFactor Blush costs about £7 has no SPF but that doesn't bother me much, I use just a little bit because too much makes me look gaudy and doll-like.
So you've all seen me from my last blog with *shivers at the memory* no makeup on, so I'm going to spare you from a before and after fiasco and just show you what I look like with the finished look :)
 On an more-than-basic-makeup-day I would normally set my liquid foundation with Lily Lolo mineral foundation powder in Porcelain, but I'll blog about that in the near future.
I would just like to say to all that don't include an SPF in their daily skincare routine to please start using one, it'll do your skin wonders and protect your skin from damaging, harmful rays. I always look for makeup products that contain some kind of SPF :) Ok, that's it from me for now - stay tuned for blog number four...
I have decided to show you my basic look for when I am out and about. I am wearing eyeshadow, mascara and a tiny slick of lipgloss too but for the moment I'm just going to talk about the makeup I wear on my face haha! Ok, so here are the four basic things I wear on my face (and they're ALL drugstore and relatively cheap - yay!):
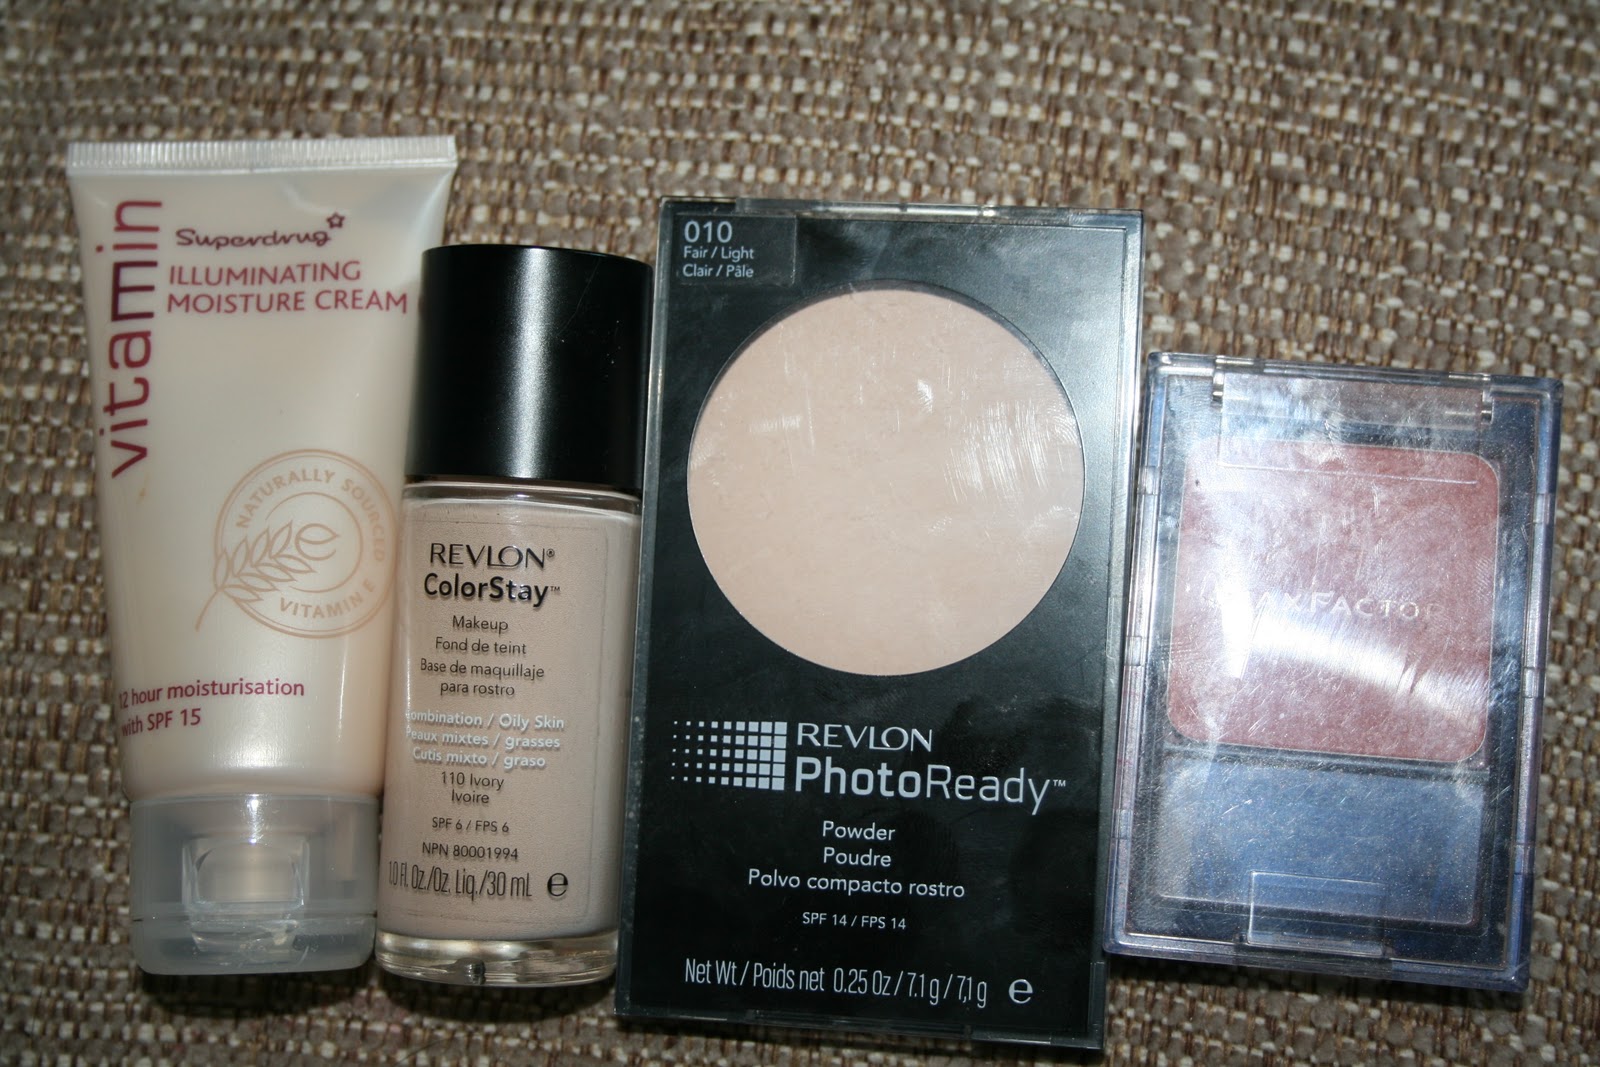
Ok, from left to right is Superdrug Vitamin E Illuminating Moisture Cream with SPF 15, Revlon Colorstay Liquid Foundation for Combination/Oily skin in 110 Ivory SPF 6, Revlon PhotoReady Powder SPF 14 and last but not least MaxFactor Flawless Perfection Blush in 220 Classic Rose. Because you can't really see the MaxFactor properly, I'll add another picture of the back so you can see :)

The Revlon liquid foundation costs about £12.50, maybe a little more than some people are willing to spend and boasts a semi-modest SPF 6 - again, important! It is quite a thick liquid with medium to full coverage which is a must for me. I use my fingers to blend it into my face and it doesn't take long to blend and dry. The Revlon Powder to set the foundation has an SPF 14 (more cheers from my protected skin!), costs about £13 and it comes with a little brush you can sweep the powder on with which is quite handy, although the brush loses its bristles fairly easily - no matter though - I have other brushes!
MaxFactor Blush costs about £7 has no SPF but that doesn't bother me much, I use just a little bit because too much makes me look gaudy and doll-like.
So you've all seen me from my last blog with *shivers at the memory* no makeup on, so I'm going to spare you from a before and after fiasco and just show you what I look like with the finished look :)

I would just like to say to all that don't include an SPF in their daily skincare routine to please start using one, it'll do your skin wonders and protect your skin from damaging, harmful rays. I always look for makeup products that contain some kind of SPF :) Ok, that's it from me for now - stay tuned for blog number four...
Thursday 24 March 2011
Solait Tinted Bronzing Foam
Now for my second ever makeup blog. Oh, happy days! I went out to town and as usual found myself in Superdrug, perusing the isles of makeup wondrousness and came along the self tanner section. The offer was two of these bottles (150ml each) for just £7 so I thought "hell, why not?" I bought them in "light/medium" for my pale, pale skin!

This is what the bottle looks like in the shops. Take a good look - and then please avoid it if you ever see it, even if it's on sale... And here's why...
I scrubbed my face and neck nice and clean, pumped the tinted foam out on to my fake tan mitt and started to apply it. The tinting is kind of useful, so you can see where you've applied it and gives you a strange, browny, shiny complexion that I wouldn't be caught dead outside my house with - it almost looks dirty and greasy in one go. I waited for a good few hours for the tanner to do its tanning magic under the tint and then headed off to the shower, washed the colour off my face, neck and chest with warm water... And the pictures below show what happened... Please keep in mind that the first picture was taken in daylight, unlike the second two, which required a camera flash...
 Eurgh... Me with NO makeup. Gross. Only my husband normally sees me like this...
 That's what I looked like with the tinted mousse/foam/rubbish on my face, chest and neck. As you can see my shoulders aren't coloured with tanner, and are their natural milk white colour hehe! Please forgive my bareness by the way *shivers*... After a few hours I headed off to the shower...
 Ok, so I am fresh out of the shower and... almost nothing had happened. I was a TEENY bit darker than I had been before I put it on, and I seriously mean teeny. In fact now I have the right tint to my skin to wear my Lancome Photogenic Lumessence foundation which in it's palest shade is still too yellow for my skin. I am now wearing said foundation and now I don't have the telltale "tidemark" on my jawline because I now have a yellow toned pale complexion instead of a pale pink tone complexion.
I am so glad that I only spent £7 because if it had been near twenty I may have cried... I think from now on I'll stick with Xen-Tan (My-Tan, I like to call it haha) and St Tropez... I think high end sometimes pays :) I don't think I'll ever use such rubbish fake tan again unless I want to look 1/4 shade darker than I really am.
That's my second makeup blog. I'll be blogging again real soon, so stay tuned!

This is what the bottle looks like in the shops. Take a good look - and then please avoid it if you ever see it, even if it's on sale... And here's why...
I scrubbed my face and neck nice and clean, pumped the tinted foam out on to my fake tan mitt and started to apply it. The tinting is kind of useful, so you can see where you've applied it and gives you a strange, browny, shiny complexion that I wouldn't be caught dead outside my house with - it almost looks dirty and greasy in one go. I waited for a good few hours for the tanner to do its tanning magic under the tint and then headed off to the shower, washed the colour off my face, neck and chest with warm water... And the pictures below show what happened... Please keep in mind that the first picture was taken in daylight, unlike the second two, which required a camera flash...


I am so glad that I only spent £7 because if it had been near twenty I may have cried... I think from now on I'll stick with Xen-Tan (My-Tan, I like to call it haha) and St Tropez... I think high end sometimes pays :) I don't think I'll ever use such rubbish fake tan again unless I want to look 1/4 shade darker than I really am.
That's my second makeup blog. I'll be blogging again real soon, so stay tuned!
Wednesday 23 March 2011
The Beginning
So this is my first ever blog. Gosh, I'm not sure where to begin! My name is Xen and I am 26yrs old with the joys of having combination, acne prone skin which is actually rather pale and with weird, red cheeks. I live in Cornwall and I love living here.... And I am a makeup addict - I can't help it - I am forever buying new makeup and am on my own little voyage of cosmetic discovery and skin care discovery too. I have been on this journey since I was twelve, and it's like an addiction I can't stop. I am not a 'natural beauty', I am not slim or amazingly good looking (although I sincerely wish I was haha), I'm short, rotundly plump with dark hair and a round face. But I would like to blog about my experiences with high end and drug store makeup, take photo's and upload them to show you all the before and after of each new thing that I buy. I want to take you on my journey of addiction of makeup and skin care, so here I am, tentatively reaching out to anyone that will care to read :-)
RED LIPSTICK
Ok, so since I was twelve years old (I know, too young to be buying makeup) I have been compulsively buying red lipsticks. Due to my pale skin colour red lips are supposed to be very complementing to us 'English Roses' and that red lips never go out of style - but let me tell you something that we're NOT told: Finding the perfect colour red lipstick can be an absolute nightmare! It's all very well checking the colour of your veins to tell whether you're warm or cool undertoned (I'm a definate cool) but trying to find a red on your own that doesn't make you out to look like a cartoon or a vampire (unless of course that's what you were aiming for) can be like looking for a needle in a pin stack. Not good, by any means!
I went out two days after I turned 26 *sigh* and with trepidation made my way to a M.A.C counter, for the very first time in my life. I must tell you now that I am rather intimidated by the beautiful, trim ladies that float around their Lancome and Clinique booths with their impressive, well cut clothes and perfect makeup. Don't get me wrong, I love high end makeup - who doesn't? But I like to grab the offending mascara or foundation quickly before one of those ladies can swoop down on me and ask me if I need help! So I went up to one of the ladies that I spend half my time trying to avoid and asked her if she could please help me find the perfect red lipstick.
She helpfully pointed out two colours that would be the closest match to my skin colour; Russian Red, a slightly blue based matte lipstick, and Lady Bug, a shinier, slightly blue based lipstick also. I can tell you now that I had done it. After fourteen years of searching (hangs head in shame) I had found them (or more honestly been directed to them). My husband obligingly bought them both for me and I fairly pranced home.
 Russian Red is a highly pigmented colour, rich and wonderfully smooth; I apply it with a lip brush for an even finish. Yes, I have a monroe piercing, I got it done about a month and a half ago. Needless to say I love it! This picture was taken with a flash so the colour looks a tad brighter than it does in real life. I would suggest that you don't smudge it, because this baby transfers like a bad boy! I put my foundation on my lips before applying this colour to give it a little more staying power, and wow, does this lip colour just keep on going, even with it's amazing transfer abilities (like to my poor husband's lips)! I don't mind reapplying my makeup throughout the day so I wear this every day (except for at work but that's a long story), and sometimes for a nice, shiny change I wear M.A.C's Lady Bug. These lipsticks cost £13.50 each, relatively expensive if you think about it, but they're cheaper than Lancome's lipsticks by far - not that I'm dissing Lancome at all - I love their cosmetics, but you know what I'm getting at.
Wowza, that was a long first blog! I'll leave it there for now... But I'll be back...
RED LIPSTICK
Ok, so since I was twelve years old (I know, too young to be buying makeup) I have been compulsively buying red lipsticks. Due to my pale skin colour red lips are supposed to be very complementing to us 'English Roses' and that red lips never go out of style - but let me tell you something that we're NOT told: Finding the perfect colour red lipstick can be an absolute nightmare! It's all very well checking the colour of your veins to tell whether you're warm or cool undertoned (I'm a definate cool) but trying to find a red on your own that doesn't make you out to look like a cartoon or a vampire (unless of course that's what you were aiming for) can be like looking for a needle in a pin stack. Not good, by any means!
I went out two days after I turned 26 *sigh* and with trepidation made my way to a M.A.C counter, for the very first time in my life. I must tell you now that I am rather intimidated by the beautiful, trim ladies that float around their Lancome and Clinique booths with their impressive, well cut clothes and perfect makeup. Don't get me wrong, I love high end makeup - who doesn't? But I like to grab the offending mascara or foundation quickly before one of those ladies can swoop down on me and ask me if I need help! So I went up to one of the ladies that I spend half my time trying to avoid and asked her if she could please help me find the perfect red lipstick.
She helpfully pointed out two colours that would be the closest match to my skin colour; Russian Red, a slightly blue based matte lipstick, and Lady Bug, a shinier, slightly blue based lipstick also. I can tell you now that I had done it. After fourteen years of searching (hangs head in shame) I had found them (or more honestly been directed to them). My husband obligingly bought them both for me and I fairly pranced home.

Wowza, that was a long first blog! I'll leave it there for now... But I'll be back...
Subscribe to:
Posts (Atom)