Tuesday 11 October 2016

Maybelline Color Drama Intense Lip Paint in 502 RED-DY OR NOT

Hello my darlings! It has been a while since I last posted a blog, I have been very busy as of late with work and family.
I know these lip paints have been around since forever when it comes to lipstick trends, but I thought I'd have my say - y'know, because there aren't enough of us doing that 😉.
Aaaaand I have always been a sucker for reds. I don't know why, I always wear nudes, but there's something about red... I just get sucked in!
These are pretty cool, they have got a fabric-coated applicator with a hole in the middle so you can squeeze the lip colour out to apply it.

The lid has a little stick of plastic in it that stops the colour from squeezing out of the tube and into the lid when it is in your bag/pocket/wherever, which is fairly handy.

The application is smooth and easy and the pigment is impressive, although it has a dark pink undertone and it stains the skin. It transfers extremely easily as it doesn't set at all, so no kissing/messy eating or worse, going out with your hair down on a windy day - scream! Also due to the applicator, you can't get a crisp line on your lips but I'm not too worried about that. Another plus is that the colour doesn't bleed on my lips, which red glosses do a lot. 
I suppose the down side is that this is a high maintenance lip colour, it will need a fair amount of time and care to reapply, unless you're not eating whilst wearing it. And do not wipe your mouth or touch your lips and then your face, because it will not be worth the dark pink stains on your face afterwards!

Do I like it? Yeah, it's alright, but I won't be reaching for this very often, I have better, long-wearing red lip colours that don't transfer half as bad and are almost maintenance-free.

Thursday 8 September 2016

GOSH Foundation Plus Cover and Conceal Review

Hello my darlings! Today I am bringing you my thoughts on GOSH's new (well, it's new to me!) foundation. It is a foundation that boasts concealer at the same time. Let's put this to the test!
It comes in a rather small - yet soft - squeezy bottle. Mine, as you can tell, is number 008 which is called Golden I believe.
It states that it has 30ml of product in the bottle, but as I started to squeeze it, I started to doubt this, as you can see above, I've pressed the bottle to half it's size to get any product out.
When I managed to squeeze a little foundation out of the tube, I was pleasantly surprised to find the consistency was quite thick and creamy and doesn't run.
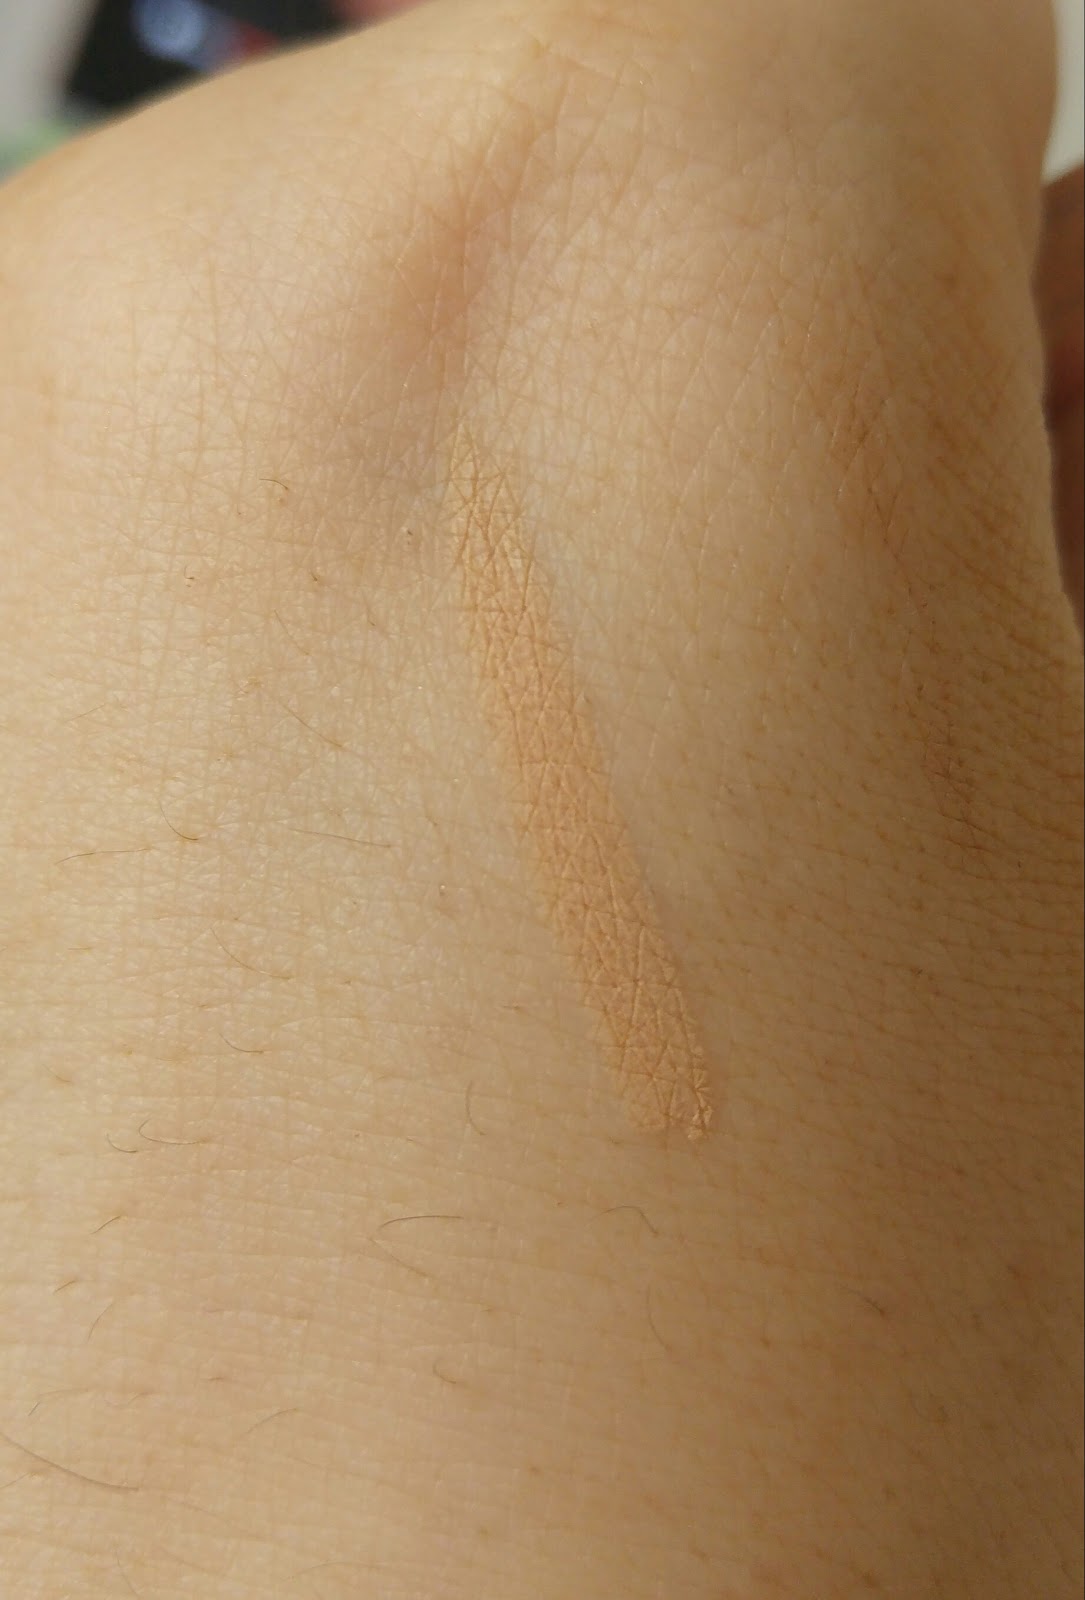
Here is the foundation blended onto the back of my hand. It smoothed out and blended easily with my fingers, giving a medium-to-full coverage.

Time to test it on my mug!
I dotted the foundation across my face and blended it out using a Real Techniques buffing brush, and let it sit on my face for a few minutes before taking the picture. It has a satin - almost dewy - finish to it. I like to keep my foundation on my skin as thin as possible; I blend a lot to make it look as natural as possible.

Just so y'all know, I have oily/combination skin. I used Milk of Magnesia on my T Zone, let it dry, then popped GOSH Primer Plus Illuminating Skin Perfector all over my face before foundation application. If I don't use MoM, my foundation will slide right off of my face in a matter of hours.
So I put the rest of my makeup on, used a setting spray and then a fixing spray (MAC Fix+ and Barry M Mist & Fix Matte Finish) and this was the end result. I am using a concealer, but only for highlighting purposes.

My thoughts:
At just £9.99, it's a reasonably priced foundation, contains no perfumes or parabens (YEESSSS!), is creamy and doesn't dry out the skin. It has good coverage, probably good for dry to combination skin (for combination/oily, a decent mattifying primer and/or powder to combat oil would definitely help longevity). I'd say the coverage on my face is probably medium, and I don't currently have any breakouts or dark circles under my eyes to cover up, so I can't comment correctly on  how good this foundation plus concealer is. Another thing is I can't say how much foundation is in the bottle, considering how much I had to squeeze to get any product out. Overall, I think this is a very good foundation, which lasts for hours, looks flawless and is small, sturdy and very portable, so will be great to throw in your bag on the go, due to the screw top lid.  I wore it for 7hrs before I blotted, which I only did once during the ten hours that it was on my face - but this is probably because of the MoM.

Pro's:
A little goes a long way, so a bottle should last quite a while.
Creamy and feels very lightweight on the skin.
Isn't drying, has a satin finish.
Suitable for dry, normal and combination skin types.
Good coverage.
Lasts hours without melting/sliding off when used over a mattifying primer.
Feels light and comfortable on my skin.
Costs just a penny shy of £10, so quite affordable.
Paraben and perfume free.
Small and portable with a screw top lid; perfect for travelling.
Has SPF 15.

Cons:
Might not hold up on combination/oily skin without a mattifying primer and/or powder.
Oxidized slightly, giving a more orange tint after an hour.
Not sure if there is definitely 30ml of foundation in the tube; I have a feeling it might be less (but I can't be sure, it's just a feeling, not a fact).

Phew! That was longer than expected!
Hugs x

Tuesday 30 August 2016

FAKE Kylie Jenner Metallic Liquid Lipsticks in Reign, King K and Heir

I don't need to tell you who Kylie Jenner is - and good thing too as I barely know who she is myself - but she became famous almost overnight with her lip glosses and liquid lipsticks etc. A lot of girls in the UK are paying up to £30 odd for a liquid lipstick and pencil set - I don't know about anyone else, but I live in Cornwall, with a job that just about covers my car, rent & bills - and I simply cannot afford such a high price tag on a lipstick set.
So what did I do? I snuck around on Aliexpress.com and found cheap dupes. Because I'm skint ha ha!
So! I found three metallic liquid lipsticks, in the colours Reign, King K and Heir.
Reign:
This is a dark metallic brown with a red base colour, perfect for those who like a real statement lip, and will be perfect for Autumn makeup looks. It goes on a little bit patchy so does require a bit of layering, which makes it feel a little thick and uncomfortable on the lips. This wears off the insides of my lips quickly when talking or eating (I'm a lady, I don't do both at the same time!) and looks fairly obvious due to its dark colouring, and would probably look better on larger, plumper lips than my own.
And of course I have to show you what it looks like from far away as I love to creep out my readers with some scary selfie shots. I mean, why not, eh?
King K:
King K is a lovely light brown/champagne metallic lipstick. Out of all three, this is definitely my favourite colour and goes with a multitude of makeup looks due to the colour. This goes on smoothly, and dries down fairly fast. Wears off less obviously than Reign due to its colour, so it's a more suitable colour for going out for the day or going for a meal.
Yes! Selfie tiiiime! You poor, poor things...
Heir:
Heir is a less obviously metallic lipstick than the last two, but still holds its own; a lovely pink that, like King K, can go with a lot of makeup looks, from daytime appropriate to night time smokey eyes. Also, like King K, this applies smoothly, dries quickly and fades better than Reign due to its sheerer and more natural colouring.
And yet another selfie to show you what it looks like with a full face of makeup.

My thoughts:
These liquid lipsticks are an absolute steal at just £1.82 each; for all three I paid just £5.46. They took about 26 days to arrive in the UK, which isn't bad, considering they're from China. I also don't know what the original colours look like, so I can't compare their likenesses in that respect, but for anyone looking for a dupe for a very low price, and don't mind waiting around, these might be worth your while and your wallet.

Thursday 18 August 2016

I Have an Unreachable Dream...

MOAN ALERT! WHINGEING IS ABOUT TO COMMENCE!
For around 6 or 7 years, I have dreamed of
becoming a nail technician. I love applying acrylic nails and LED manicures (like Shellac but cured under LED lights instead of UV and takes much less time). When me and my husband were still together, I thought I had all the time in the world to follow my dream, so I relaxed, I did a beauty course in college as my first stepping stone... And then my marriage came to a rather abrupt halt, I moved out of my home of almost ten years, left my husband and my cats and started a new life elsewhere.
For the past 15 months I have been paying rent, and working overtime to make ends meet and so that I can live a comfortable life and not have to struggle.
Here lies my dilemma; with the divorce proceedings about to start and with no money to do a nail course (which are usually around the £1000 mark), I can no longer see my dream coming true.
I do my sister's nails, my own and a couple of friends and so far I have only recorded mine and my sister's results:
Above, my sister's nails the first day that I did acrylic sculpting on her nails, french fade. It was the first time I'd done french fade on more than one nail. 
Two weeks later, I did a basic infill. Her nails grow so quickly, she had around a month's growth in just two weeks!
Another two weeks passed and I rebalance her nails. They would have been slightly longer but she had filed them down a little before I got to them.
And finally, my nails. I have a different glitter accent nail on each middle finger because I like to be unique and it goes with my motto that "life is too short to find the matching sock", ha ha. 
 I don't know who will read this, but I was wondering if anyone else has faced this dilemma and what they did about it? Any help and/or advice would be lovely and really appreciated x


Wednesday 10 August 2016

Rimmel Scandal'Eyes Waterproof Kohl Kajal Eyeliner in Nude Review

I have never owned a white or nude eyeliner in my life. I was very tempted indeed to buy Urban Decay's waterproof liner in Walk of Shame, but just couldn't justify spending £15.50 on an eyeliner. I know that might make me sound cheap, but since life took a rather sharp down turn last year, I'm more cautious about spending my hard earned moolah on makeup. Even my Urban Decay lipstick was free with vouchers I was given for long service at work!
Anyway! We're here to look at my new purchase!


I saw this in Superdrug for £3.99, and bought it on impulse. And I'm rather glad I did.
I swiped it (as always) on the back of my hand; it applied smoothly, the pencil is very soft and pigmented and when it dried (30-60 seconds later), I rubbed it with my other hand, and it stay put really well.
So! Time to apply!
Above is me with my makeup done but with my waterline bare of any products.
And above is me with the Rimmel waterproof eyeliner on. I like that it applied smoothly to my waterline and didn't cause any soreness or irritation.
And here you can see the effect on both eyes from a distance.
I went about my day, and didn't check my waterline for about 6hrs, and when I did I was pleasantly surprised to see that there was still about 60% of the liner remaining. I touched it up with some more liner and it stayed really well for another 5 or so hours. I'm very impressed with this liner, and will be reaching for this in the near future.

Any nude waterproof eye liners that you use that I should know about? I'd love to know! Xx

Monday 8 August 2016

Urban Decay 24/7 Glide-on Lip Pencil in "Uptight" Review

Hello my beauties, today I shall be talking to you about Urban Decay's rather scrumptious lip liner, in the colour Uptight...


So my sister and I went to a makeup "masterclass" at the Urban Decay stall last week in House of Fraser. It was to do with the new eyeshadow palette they have just released; the Moondust palette. The lady showed us how to apply makeup (to whom I listened to and watched and nodded politely, hoping to learn any valuable tips), and I was fine - even when she forgot to apply concealer to her model until after she had applied powder foundation over the liquid foundation - right up until she was highlighting. She applied the highlighter, saying "Now don't apply too much highlighter, otherwise you're just going to look stupid,". My sister and I - highlighted to the Gods this fine day, her with Jeffree Star's Peach Goddess and I with a beautiful handmade highlighter called Ophelia that I bought from a wonderful girl from Depop (she's on Instagram and her name there is sophiekia) - looked at each other and just rolled our eyes and laughed under our breath and murmered "I'm with stupid!".
BUT! I digress!
What caught my eye when she was applying lip liner to her model. As you may well know, UD has come out with something like 100 new lipsticks, and have got a massive amount of matching lip liners. I wanted to buy "Liar" to match my "Liar" lipstick, but when I tried it, the colour seemed way too dark, much darker than my lipstick. And that's when I tried "Uptight". I found the perfect match for my lipstick!
The colour is richly pigmented and the pencil is so smooth to apply, it really is a dream. No dragging or uneven lining here!
Scream! My bare, freckled lips! My lips - up close - are fairly lopsided and uneven, so please forgive this. There's nothing I can do to change this unless I use an app to adjust my lip line, but it's tedious and I just can't be bothered! Also please excuse any hairs you see, I'm a real fuzz-face!
Here we are, with my lips filled right in with the pencil. It's a really lovely peachy brown. It reminds me of MAC's Half n Half or Modesty. I'm a sucker for pinky/peachy brown nudes.
Here I am with just the pencil on my lips, so you can see the effect it has on my makeup...
And here I am with Urban Decay's Lipstick in "Liar" on over the top. Match made in lipstick heaven, right? I'm loving this right now.
The liner holds up for hours but does need retouching if you eat a meal, especially if it's oily. This is a lovely lip liner, but on the pricier side at £13.50.

What are your thoughts? Do you have any long wearing lip liners that I need to know about? Please be sure to let me know! Xx

Tuesday 26 July 2016

Barry M Chisel Cheeks Contour Creams Review

So I was in Superdrug the other day and this little beauty caught my eye. Of course I checked for parabens (I've been caught out so many times!) and decided that, at £7.99, I was going to grab them up. By the way, these beauties are cruelty free and vegan, so good for people that don't like their cosmetics tested on animals.
Normally, as an oily/combination skinned gal, I contour and highlight after powdering my skin, but it's good to change it up a bit after being stuck in the same routine year after year...
So I put on my foundation and concealer, then went to work with the contouring colour...
Oh, yeah! Check out the girl who can't even contour! Haha! The cream contour just glides on to the skin so smoothly, and it's very pigmented, which was great.
I then started blending it out with a damp Real Techniques miracle sponge. If you use less contour colour, it blends out to a very natural finish. I used a heavier hand as I wanted a more bronzed and more obvious contour.
First she can't contour, now she's pulling faces, y'all... Ahem, yeah, so once I blended out the contour, I went in with the highlight colour, which is a lightish cream colour and blended that in with the Real Techniques sponge again.
So this was the finished look, without any powder. It didn't look seamless, So I used my Real Techniques contour brush and blended my forehead and cheeks a little more, then set it with powder, finished my face around 12pm and went about my day.
And this is me at around 8pm. I have been quite impressed with this contour kit, and it's at a good price too. These are creams so they can feel and look odd upon application, but once blended out looks and feels much better and not so heavy on the skin. I personally would advise that these be set with a powder after blending too, as cream shifts and slides easily across the skin. I also found that my sponges got clogged up with the cream very quickly, so I use two Real Techniques contour brushes for blending it all out; one for the contour, one for the highlight.

I really enjoy using this kit, and will continue to use it as a nice way to change up my makeup routine. Does anyone else have this kit? I'd love to hear your thoughts xx

Wednesday 29 June 2016

MUA Luxe Power Brow Sculpting Gel Review

I have been wanting to get my paws on these beauties for a short time, as my brows are pretty darned sparse. I always have to fill them in, from one end to the other, and this gel-cream formula seemed like a good idea. It's definitely a change from my normal pencil routine, for sure.
I bought them for £4 each at Superdrug, in the colours 'Mid Brown' and 'Dark Brown'. I tend to lean towards mid brown colours for my brows as my hair is dark brown BUT my eyebrow hairs are black. And because your brows (if you have brown hair of most shades) are supposed to be two shades lighter than your hair, mid Brown works best as it can be darkened up if necessary.
Each pot comes with its own brush, built into the lid. The brush can be made longer by clicking the opposite end of the brush back into the lid and voila! Longer brush handle!
Ta dah! Ahem! Sorry, I'll continue...
My mid brown pot looked wonderful when I got it home. My dark brown pot, however, looked like it had been overheated and had kind of melted all around the pot and some of the product was even on the inside of the lid.
To be honest, I'm not too bothered by all this. Just thought I'd share haha.
These are the two gels, swatches on my thumb. Top is 'Dark Brown', bottom is 'Mid Brown' These claim to be long lasting and smudge resistant and boy, are they; I rubbed both lines of colour really hard after they had set and the colour barely moved on my skin. I've washed my hands at least 7 times today, and I still have two faint brown lines on my thumb, 12hrs later. They will have to be removed with makeup remover very shortly!
Soooo this is my bare eye/skin/brow - I know, scary stuff! As you can see, my brows are thin - overplucked as a teenager, now the only thing I use tweezers for is to apply false eyelashes - and sparse, so of course they need to be filled in on a daily basis.
So here is the same eye with some basic makeup (age is upon me, my hooded eyes are getting worse!), and my brow filled in with both of the gels. I think I made them look sort of natural looking. I used Dark Brown on the tail end of the brow for definition, and Mid Brown on the rest of the brow to make the brow look fuller.
The gel is super pigmented and a little goes a long way. The brush that goes with it could do with being thinner, so the brush strokes wouldn't be so wide and heavy-handed-looking, but at £4 each I am not complaining.
As for longevity, I applied this gel on my brows around 12hrs ago, and they haven't melted, smudged or faded away. I wish I could say that about my foundation (Hi, super oily T-Zone!), but my brows look like they could go for hours longer without a problem.
Hugs x